Living without a proper kitchen and it being winter therefore DARK by the time I get home and when I leave home, I'm not cooking much at my place.
I end up cooking at work. We have a microwave. So I'm learning to microwave cook. I'm not a big fan of radiating food, but one works with what one has. I tried to avoid it for a while but that meant the only hot meals I got some weeks were when I went to a restaurant. That is not frugal and not terribly healthy.
I am buying organic/natural soups when possible to have a bit of a pantry stock rather than buying a meal at a time. This is helping me get back on frugal track.
I have in the pantry (meaning a file drawer and a small portion of the work fridge) at the moment:
Almond milk (they are selling it at the Dollar Store right now...good brand, nonGMO, not sugary)
Cereal (don't normally eat this but it is organic, high fiber, no added sugar, and was 99cent for 8 servings at the Grocery Outlet)
Organic peanut butter
Natural almond butter
Chia fruit spread (like jam, but made with chia seeds instead of pectin, found on cheap sale)
Protein bars for emergency food needs
A few hazelnuts and almonds
Soup, canned and boxed, mostly organic
Salsa (mostly used as salad dressing and on eggs)
Eggs
Tuna
Miso paste
Coffee (pre-ground)
Tea bags and loose tea
Bananas
Rolled oats, organic
A few spices
Oil
Vinegar
Honey
Mustard (my homemade stock because I didn't want the jars to freeze/thaw at home)
Green chilies (because they make crappy soup edible)
Bread
Fake cheese (found on sale, a rare buy)
I just finished the salad greens or I'd have that too.
Also will bring in a few zevia sodas to battle the mid-afternoon sugar cravings as needed.
So it's a serious stock of food. I could live in the office for a couple of weeks and not lose much weight given the calorie stores.
Some meals are cold sandwiches, cereal, etc.
Main sandwiches are pbj and tuna salad which I make with my mustard instead of mayonnaise (saves buying mayonnaise and tastes better anyway).
But, I like a hot meal. Hence eggs. You can make OK scrambled eggs with stuff in them in the microwave. They are a bit rubbery, but edible especially with salsa on them. I'm going to try the 2-eggs-1-banana recipe that works in a frying pan. With the cinnamon and nutmeg from the spice stash it should be edible.
Plenty of microwaved soups. Boring but edible. Better when I've got an avocado to slice into them. Those are also good in the eggs and help correct the rubbery texture.
It's fairly simple eating but not bad at all. Other than salads and greens, I end up not eating many veggies other than things like beet soup, squash soup, and the bits in chunky soups. I think I should work on that. Maybe add sweet potatoes. Or mixed veggies with a can of diced organic tomatoes and call that soup or stew...if I threw in a can of tuna it would taste awful but be very healthy.
I'm also trying to brew water kefir in the office as I have no stable-temperature area at my house for fermenting. We'll see. It seems to be going slowly so I'm getting impatient.
Solar cooking in the summer was one type of "limiting factor" or "learning opportunity" so I'm looking at this the same way.
I've also cooked a bit on the wood stove I use for heat and the little butane burner. More on that anon.
Friday, December 11, 2015
Friday, December 4, 2015
10 Frugal Air Travel Tips
For the first time in YEARS I'm traveling for the holidays. Flying. Through Minneapolis. My mantra will be "at least it's not Chicago." Sometimes you do these things.
Anyway. I saw on my favorite frugal website, The Dollar Stretcher, an article titled "10 Things to Make Travel Easier" and was stunned that it was basically 10 things to BUY to make a flight or road trip more pleasant. Uh...hello people..frugal! NOT! Don't buy stuff. Repurpose and/or think ahead.
So here are 10 things I've done to make travel easier/frugaler:
1) Bring a refillable water bottle. Buying water is for punks (nothing against punks). I have 2 stainless steel water bottles. I take one of them. Bring it through security empty (because no liquids) and fill it up at a drinking fountain. Many airport drinking fountains now have a water bottle filling station like this:
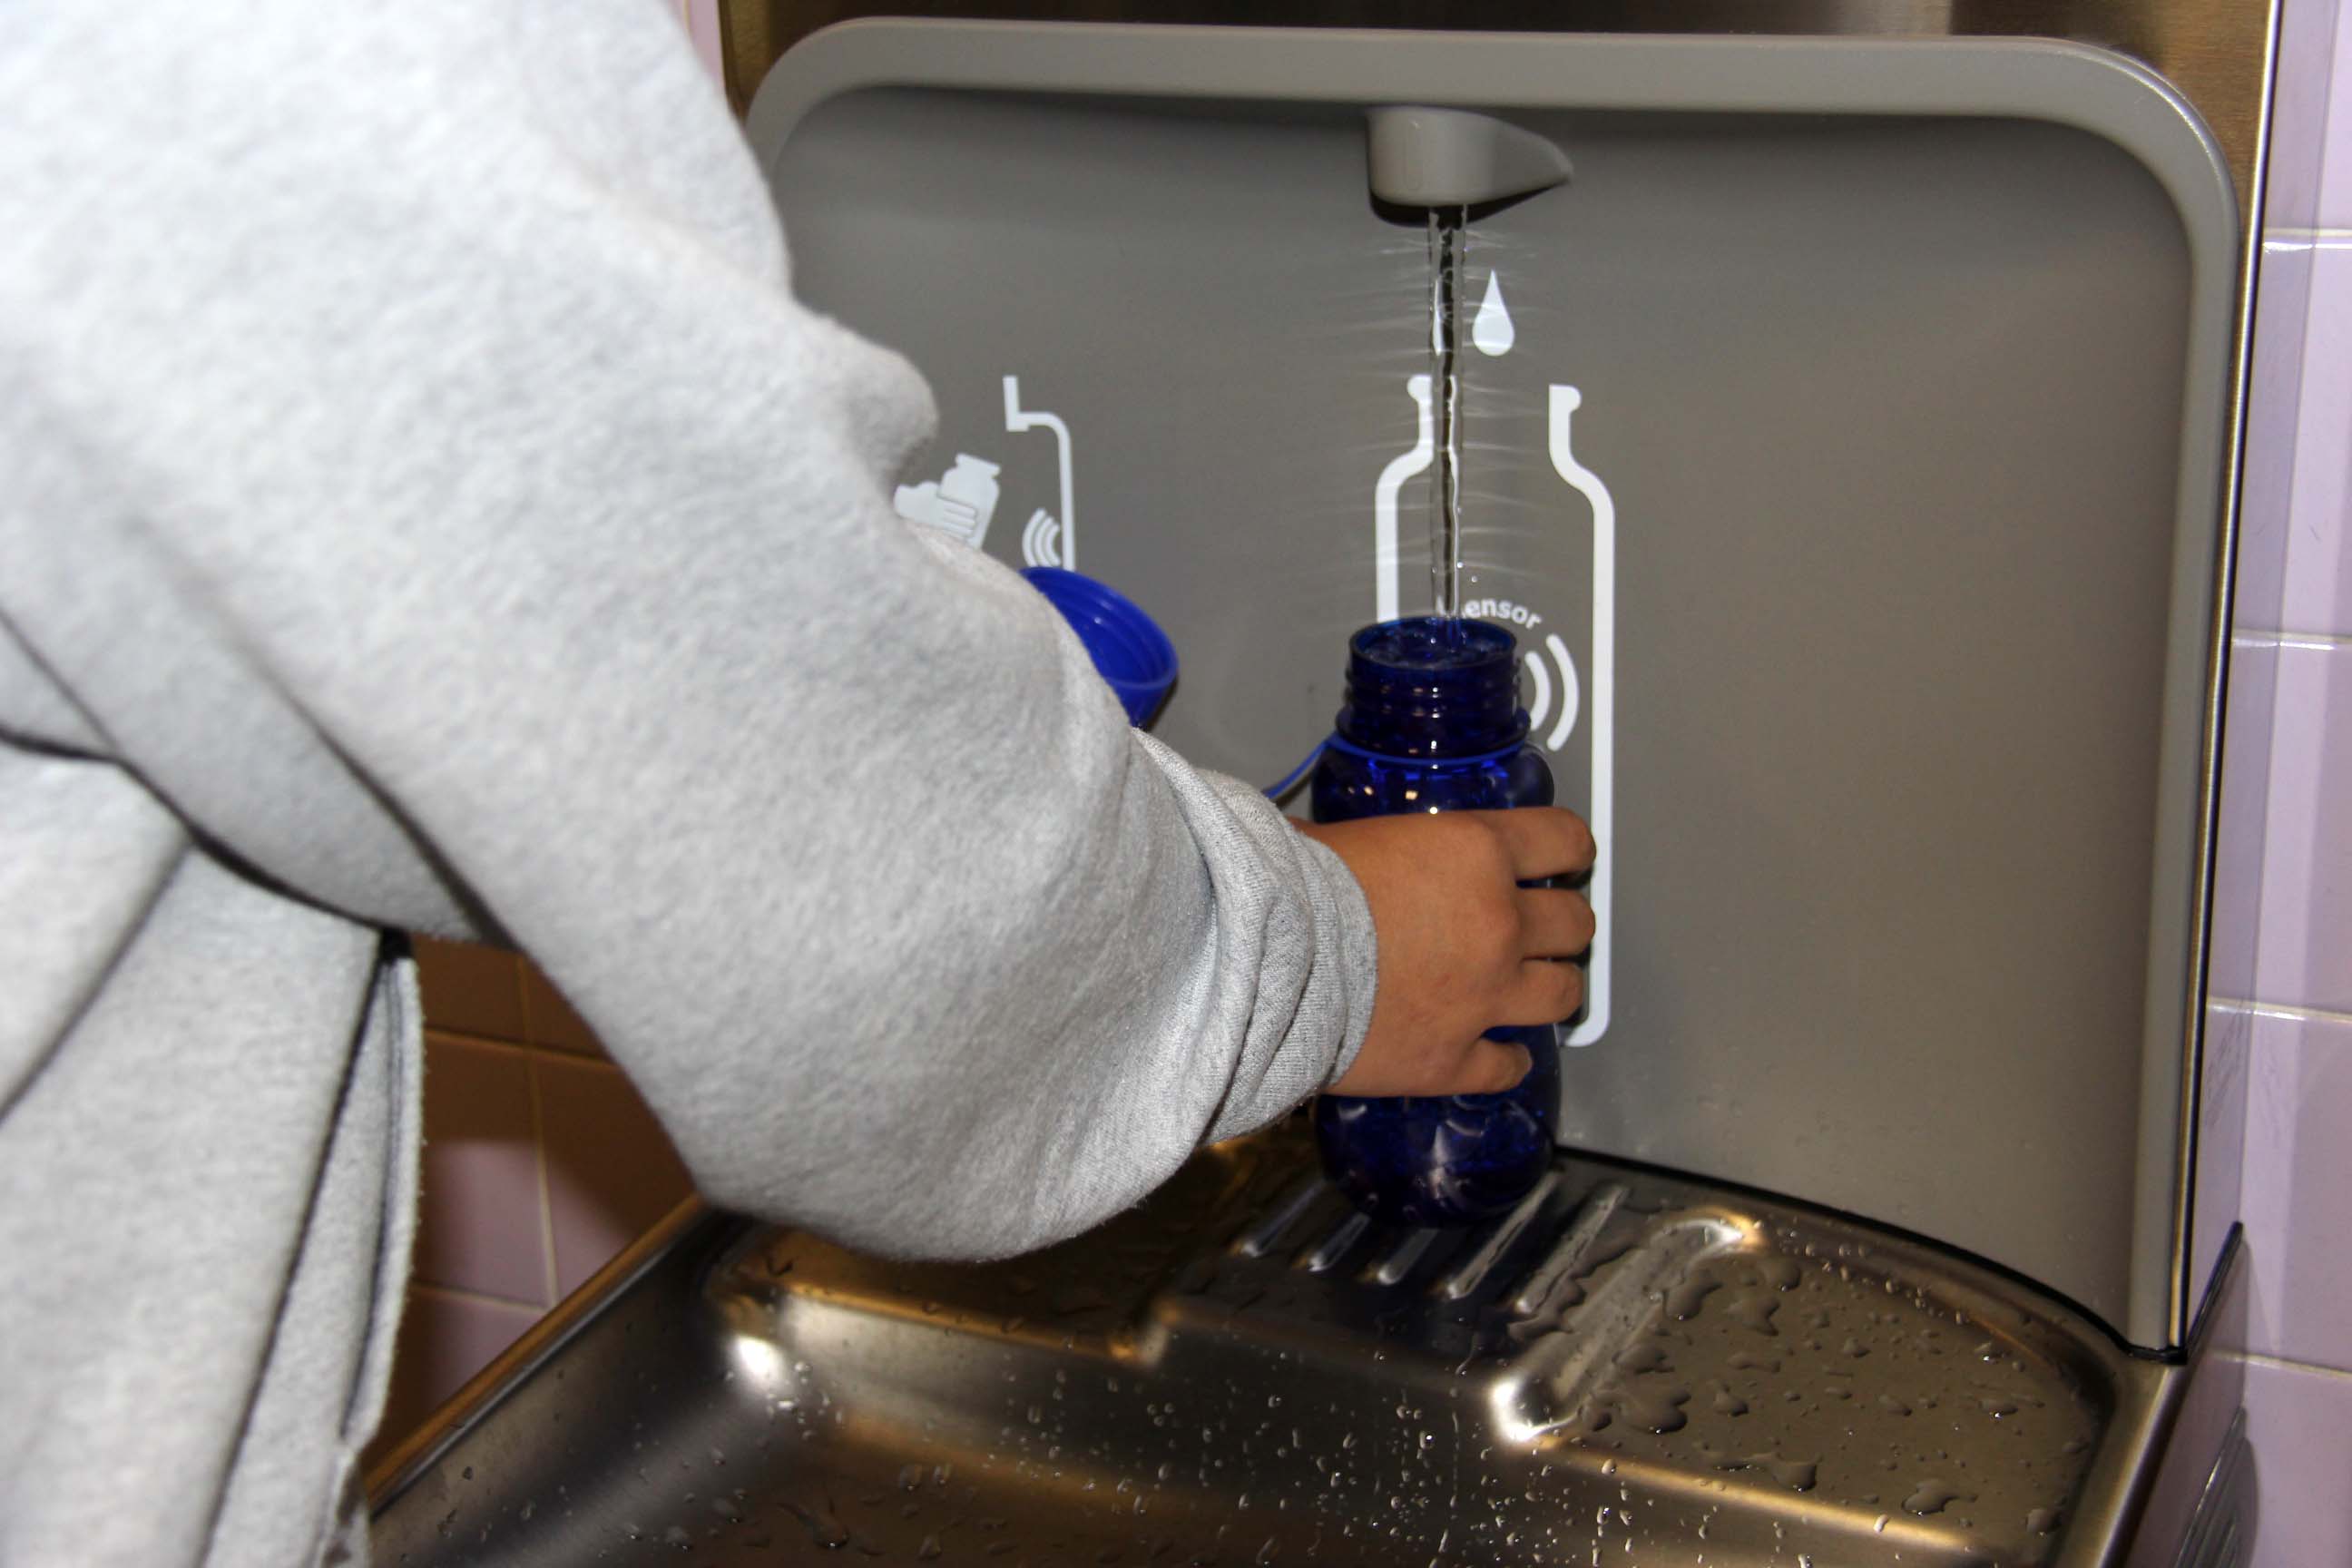
If you don't have a refillable bottle for the love of all that is thrifty DO NOT BUY ONE...at least not retail. I used to travel with an enamelware cup carabinered to my backpack. That works too though you really must take it off the carabiner to use it. You can use an old pop bottle, the left over bottle from your purchased water. You COULD use a mason jar but traveling with a glass jar is not the world's best idea. Anyway, you get the picture. Bring something to drink out of. Then don't buy drinks. Use the vessel you brought.
2) Pack in a single carry on item. EVEN if there is a free checked bag, you are going to have to wait for that and it's weight and hassle you don't need. You can also bring a personal item like a purse, brief case, or laptop in bag on most flights. Do check ahead. I have a purse that goes totally flat and can jam inside my single carry on bag. I usually carry on the backpack I use all day every day for everything. To achieve this plan ahead and pack light. No, even lighter. I wear the bulkiest items which is a pain for about 2 minutes during security screening when I take off my coat, my giant sweater or hoodie, and lace up boots, revealing a hefty turtleneck or long sleeve tee-shirt, thick wool socks, and a belt. The belt of course must come off. Sure, the first layer gets a bit sweaty but you can take off the coat and sweater once on the plane if you must. I usually just open up that tiny vent fan thingy in the ceiling and hope for the best. I do remove the coat.
In winter I usually pack, in addition to what I'm wearing 2 pairs of wool socks, jammy pants (hopefully something tatty that I want to throw out or put in the ragbag anyway...these will be abandoned at the destination), 4 pairs of undies, a bra (again, pack or wear undies and bras you want to throw out anyway, avoid the painful wedgie makers though or you'll ruin your trip), a few long sleeve t-shirts, a thin button down shirt, one more heavy overshirt like a sweatshirt or sweater. All the clothes more or less go together and it's cheaper to grab an item at a thriftstore if an unanticipated need comes up, than to check a bag. And of course, I pack toiletries, just a toothbrush, any meds I might be on or need like immodium, a comb, and a hairbrush. When is the last time you were somewhere without the possibility of getting shampoo and soap and toothpaste on arrival? Liquids are a hassle and waste space. In the summer my clothes are usually thinner and I can sometimes jam in a pair of shoes so I can switch off. If you pack shoes, fill them with the socks, undies and bras before putting them in. Leave no airspace in anything. A carry on, like nature, abhors a void.
This trip, I will want my laptop so I'll need to cram that in . I may end up taking the carry on I got from Rick Steve's website rather than my backpack. Easier to get the laptop in with that one.
3) Bring a snack with you! Seriously. I like to carry nuts, jerky, whole fruit, and/or a boiled egg. Jam those in the carry on. You can do it! You freed up all that space by stuffing the underpants in your shoes. Nuts to not take up much room. Also nice to mix dried fruit into the nuts. A bit of that and some water from your bottle and you will save time, money and potential stomach distress (which will save carrying that extra pair of undies for when the airport food makes you poop your pants). On my last flight I had locally made jerky and the other suckers in economy class were super jealous.
4) Use that giant sweater or hoodie you are wearing as your neck pillow. You do not need to buy or lug around a neck pillow. Or any stupid pillow. Just roll up an article of clothing and brace your neck/head with it, or stuff the hood of the hoodie you are at that moment wearing under the side of your head and nap on it.
5) Always pee an extra time before you get on the plane. When they announce preboarding, which you won't be doing because you bought the cheap ticket, head to the turlets and pee again. Not having go get up and flail your way through the overcrowded economy class cabin simplifies your life. If you must you must, but do what you can to avoid it.
6) Keep your entertainment item SMALL if you must bring one. If you are incapable of occupying your mind without outside stimulation, bring something small. A magazine (that you can throw out once you've read it), a book from a tiny free library to return to a different tiny free library at your destination, an ipod. I don't know how many times I've watched people drag out enormous tomes to read or multiple items of electronics. Meanwhile, there I am playing solitaire on my ipod, or even more likely, looking out the window or people-watching (and obviously judging) the others on the flight.
7) Be kind to ALL airport and airline staff. I always thank the janitors if they are cleaning an airport bathroom. I've been a janitor. It was like I was invisible. People completely ignored me. Weird. I truly appreciate a clean airport toilet so I thank them. Same with the flight attendants. If you want your free cola with a gobbit of spittle or a dose of anger, by all means be a high maintenance twat. But when it's time to put someone in the vacant exit aisle, they are going to go with the nice one, not the persnickety whiner. Also, why make someone's day crappy? Just no point to it. Life is easier if you are polite.
8) At each layover, and you bought the cheap ticket so there will be at least 1, walk around. Since you packed light, you can do this. Get a drink. Have a pee. Get the blood out of your legs before you get back in the fetal position in your economy seat. You won't be quite as exhausted upon arrival.
9) Put your tiny carry on under the seat in front of you if at all possible. This saves time on the way into and out of the seat. You're more likely to catch that bad connection that saved you 100$ on the ticket. You can jam your toes under it for a while, then rest your feet on it for a while during the flight. You can have your coat in your lap or use it as a pillow once the flight is in the air. Maybe practice taking it off and putting it on in the confined space of an airline seat. Punching your seatmate in the face while getting comfy is not a way to have a pleasant trip.
10) Pee again and fill your water bottle before you leave the airport. The taxi/bus/train/friend taking you to your final destination may get waylaid along the route in construction, a traffic jam, who knows. If you have a full water bottle and an empty bladder, this situation won't be nearly as trying. Hopefully you also still have a wee bit of jerky or a few nuts to share.
Anyway. I saw on my favorite frugal website, The Dollar Stretcher, an article titled "10 Things to Make Travel Easier" and was stunned that it was basically 10 things to BUY to make a flight or road trip more pleasant. Uh...hello people..frugal! NOT! Don't buy stuff. Repurpose and/or think ahead.
So here are 10 things I've done to make travel easier/frugaler:
1) Bring a refillable water bottle. Buying water is for punks (nothing against punks). I have 2 stainless steel water bottles. I take one of them. Bring it through security empty (because no liquids) and fill it up at a drinking fountain. Many airport drinking fountains now have a water bottle filling station like this:
If you don't have a refillable bottle for the love of all that is thrifty DO NOT BUY ONE...at least not retail. I used to travel with an enamelware cup carabinered to my backpack. That works too though you really must take it off the carabiner to use it. You can use an old pop bottle, the left over bottle from your purchased water. You COULD use a mason jar but traveling with a glass jar is not the world's best idea. Anyway, you get the picture. Bring something to drink out of. Then don't buy drinks. Use the vessel you brought.
2) Pack in a single carry on item. EVEN if there is a free checked bag, you are going to have to wait for that and it's weight and hassle you don't need. You can also bring a personal item like a purse, brief case, or laptop in bag on most flights. Do check ahead. I have a purse that goes totally flat and can jam inside my single carry on bag. I usually carry on the backpack I use all day every day for everything. To achieve this plan ahead and pack light. No, even lighter. I wear the bulkiest items which is a pain for about 2 minutes during security screening when I take off my coat, my giant sweater or hoodie, and lace up boots, revealing a hefty turtleneck or long sleeve tee-shirt, thick wool socks, and a belt. The belt of course must come off. Sure, the first layer gets a bit sweaty but you can take off the coat and sweater once on the plane if you must. I usually just open up that tiny vent fan thingy in the ceiling and hope for the best. I do remove the coat.
In winter I usually pack, in addition to what I'm wearing 2 pairs of wool socks, jammy pants (hopefully something tatty that I want to throw out or put in the ragbag anyway...these will be abandoned at the destination), 4 pairs of undies, a bra (again, pack or wear undies and bras you want to throw out anyway, avoid the painful wedgie makers though or you'll ruin your trip), a few long sleeve t-shirts, a thin button down shirt, one more heavy overshirt like a sweatshirt or sweater. All the clothes more or less go together and it's cheaper to grab an item at a thriftstore if an unanticipated need comes up, than to check a bag. And of course, I pack toiletries, just a toothbrush, any meds I might be on or need like immodium, a comb, and a hairbrush. When is the last time you were somewhere without the possibility of getting shampoo and soap and toothpaste on arrival? Liquids are a hassle and waste space. In the summer my clothes are usually thinner and I can sometimes jam in a pair of shoes so I can switch off. If you pack shoes, fill them with the socks, undies and bras before putting them in. Leave no airspace in anything. A carry on, like nature, abhors a void.
This trip, I will want my laptop so I'll need to cram that in . I may end up taking the carry on I got from Rick Steve's website rather than my backpack. Easier to get the laptop in with that one.
3) Bring a snack with you! Seriously. I like to carry nuts, jerky, whole fruit, and/or a boiled egg. Jam those in the carry on. You can do it! You freed up all that space by stuffing the underpants in your shoes. Nuts to not take up much room. Also nice to mix dried fruit into the nuts. A bit of that and some water from your bottle and you will save time, money and potential stomach distress (which will save carrying that extra pair of undies for when the airport food makes you poop your pants). On my last flight I had locally made jerky and the other suckers in economy class were super jealous.
4) Use that giant sweater or hoodie you are wearing as your neck pillow. You do not need to buy or lug around a neck pillow. Or any stupid pillow. Just roll up an article of clothing and brace your neck/head with it, or stuff the hood of the hoodie you are at that moment wearing under the side of your head and nap on it.
5) Always pee an extra time before you get on the plane. When they announce preboarding, which you won't be doing because you bought the cheap ticket, head to the turlets and pee again. Not having go get up and flail your way through the overcrowded economy class cabin simplifies your life. If you must you must, but do what you can to avoid it.
6) Keep your entertainment item SMALL if you must bring one. If you are incapable of occupying your mind without outside stimulation, bring something small. A magazine (that you can throw out once you've read it), a book from a tiny free library to return to a different tiny free library at your destination, an ipod. I don't know how many times I've watched people drag out enormous tomes to read or multiple items of electronics. Meanwhile, there I am playing solitaire on my ipod, or even more likely, looking out the window or people-watching (and obviously judging) the others on the flight.
7) Be kind to ALL airport and airline staff. I always thank the janitors if they are cleaning an airport bathroom. I've been a janitor. It was like I was invisible. People completely ignored me. Weird. I truly appreciate a clean airport toilet so I thank them. Same with the flight attendants. If you want your free cola with a gobbit of spittle or a dose of anger, by all means be a high maintenance twat. But when it's time to put someone in the vacant exit aisle, they are going to go with the nice one, not the persnickety whiner. Also, why make someone's day crappy? Just no point to it. Life is easier if you are polite.
8) At each layover, and you bought the cheap ticket so there will be at least 1, walk around. Since you packed light, you can do this. Get a drink. Have a pee. Get the blood out of your legs before you get back in the fetal position in your economy seat. You won't be quite as exhausted upon arrival.
9) Put your tiny carry on under the seat in front of you if at all possible. This saves time on the way into and out of the seat. You're more likely to catch that bad connection that saved you 100$ on the ticket. You can jam your toes under it for a while, then rest your feet on it for a while during the flight. You can have your coat in your lap or use it as a pillow once the flight is in the air. Maybe practice taking it off and putting it on in the confined space of an airline seat. Punching your seatmate in the face while getting comfy is not a way to have a pleasant trip.
10) Pee again and fill your water bottle before you leave the airport. The taxi/bus/train/friend taking you to your final destination may get waylaid along the route in construction, a traffic jam, who knows. If you have a full water bottle and an empty bladder, this situation won't be nearly as trying. Hopefully you also still have a wee bit of jerky or a few nuts to share.
Wednesday, November 25, 2015
Making Soup
Always thrifty and usually delicious!
I had a person ask me about making broth. He may have been thinking bone broth but I decided to go with how I make brothy soup.
Here it is:
How to make brothy soup.
You don’t have to boil bones forever to get broth. You can, but there are other ways. Pretty much when you boil anything you get broth. The issue is whether it is delicious.
So, here’s a basic soup recipe that will have a nice delicious broth:
1) Dice up an onion. Smaller than you think you can. Now dice it even smaller
2) Chop up a stick of celery (if you used a big onion, use a big celery). Now chop it smaller.
3) Chop up a carrot or 2 (if you used a big onion, use a big carrot or two). Chop it really small. Then chop it smaller. (the mix of onion, carrot and celery for soup is called “mirepoix” and pronounced “MEER-uh-pwah”)
4) Smash some garlic. As much as you like.
5) Heat 2 tablespoons of oil in a soup pot. 3quarts minimum size so you have room to stir. If you want more soup, use a bigger pot.
6) Saute’ the chopped veg and garlic low and slow. For quite a while. Like until the veggies are pretty mushy and the onion turns yellow/golden. If you’re in a hurry, fry it hotter. It will be good but not as umami.
7) Add water. About a quart or 2. If you add boiling water, you’ll be happier but cold water will work.
8) Add a bay leaf and any other herbs/spices you think would be nice.
9) Add more veggies. If you’re feeling lazy, use a bag of frozen mixed veg that you have thawed out (unless you forgot to thaw it out, in that case, add it frozen). If you’re not feeling lazy, use the time while the onion/celery/etc mixture saute’s to clean and chop veggies. Chop hard veggies smaller than soft veggies. E.g. potato or sweet potato in a small size will cook in the same time as broccoli tops in a big dice. If you want to add bok choy or spinach, wait until you are almost ready to serve the soup. Like the last 10 minutes.
10) If you want noodles, put those in and cook as long as the package says. OR you can cook them separately and throw them in at the end or even put them in the bowls and put the soup over them.
11) Eat.
To use LEFTOVER MEAT in the soup dice it up and throw it in when you put in the other veggies.
To use FRESH MEAT in the soup, chop it up and saute’ it with some oil it in the pan you want to use for the soup. When it’s cooked, take out the meat and put it in a bowl. Pour off all but about 2 tablespoons of the oil/grease but DO NOT scrape up any bits stuck to the bottom. Then, start with step 1 and put the meat back in when you are putting in the water and the veggies. Scrape the crusties off the bottom of the pan as you saute’ the onion/etc and as you stir the soup.
Use any meat. Use any veggies. It’s all good.
If you have bones in left over chicken or turkey or whatever, throw the bones and skin in the crockpot. Add water until it is 1 inch below the top edge of the crockpot. Put in a couple tablespoons of vinegar if you have it (it dissolves some calcium and gelatin out of the bones/skin and makes a richer broth). If you don’t have it, don’t worry about it. Let it cook at least overnight or all day.
Skim the scum off a few times when you think of it, but mostly just leave it alone and leave the lid on.
Take out the bones and skin and meat bits. Pick the meat bits off and throw in a bowl. Throw out the bones and skin.
If you chill the broth before eating it, you can lift the fat off the top when it hardens. If you want to use it right way, throw in your veggies, herbs, and whatever else you want (including a saute’d onion mixture and the pan crusties from that) and the meat you picked off the carcass. Let it all heat through for an hour or two, or for ages. It will be even better the next day if you have leftover soup and reheat it.
If soup is bland, add a teaspoon of lemon juice or fancy vinegar when you serve it up in a bowl. It will do wonders.
If you want to make soup in a crockpot and not dirty a pan on the stove frying the veggies, just throw them in the crockpot. It will work. You can chop them bigger for the crockpot because you’ll be cooking them for ages. Throw in everything but greens/spinach/noodles right at the beginning. Put those in 30 minutes or so before you are ready to eat. I prefer not to put raw meat in the crockpot, but other people do it and they don’t die. It just doesn’t taste as yummy as fried or left over meat.
Thursday, November 12, 2015
Learning to Make Baskets!
This took me about 7 hours.

I still need to put some buckskin around the top and then voila! Finished basket. The social norm in my community is to give away your first item (first harvest, first craft work, first whatever) (not first born though). I have someone in mind already but am taking orders from family for xmas 2020!!
I still need to put some buckskin around the top and then voila! Finished basket. The social norm in my community is to give away your first item (first harvest, first craft work, first whatever) (not first born though). I have someone in mind already but am taking orders from family for xmas 2020!!
Friday, October 23, 2015
TV....I REALLY really don't get it
I admit I like the Daily Show, the Nightly Show and Last Week Tonight and I watch them on the internet. What I don't get anymore is how people pay for TV and just have it on all the time.
This always comes up for me when I"m at a hotel. There IS a TV so I turn it on. Then I surf and surf and surf. And it's all crap. Crap crap crap. At the moment I'm stuck with "Say Yes to the Dress" as the least offensive thing on. "Reality" shows are the least "real" things I've seen. I. Don't. Get. It.
Enough. Others are welcome to spend money on TV if it brings them joy or they want to or whatever. But for me, I don't think I'll ever do it again. I'm going to stick with my no TVchoice and keep watching the occassional DVD movie or TV series from the library. Free and I have to turn them back in so I don't just sit there staring which I would TOTALLY do if I had TV.
Saturday, September 26, 2015


Tuesday, September 22, 2015


Monday, September 7, 2015
O-Pads! A Great Idea
Of course I have not vetted this as to actual delivery rates etc, but it seems like a SUPER idea.
For a 20$ donation you can provide a young woman with a supply of re-usable menstrual pads.
http://www.opads.info/
What a great idea! The struggle of girls in Uganda, where they are made, and in many places (say...Iowa were I grew up) with embarrassment over menstruation stains and spills and what not is grim. Not to mention the ruined clothes. Then add to that the monthly expense in places where there is just not the money for it. Women and girls can end up hiding out for the week. That affects schooling, income, and freedom. Makes me appreciate the GIANT Stayfree pads of my youth. Sure, it looked like had a hoagie bun stuffed in the crotch of my skin tight Zena jeans, but at least I could go to school. Of course, I shortly switched to tampons. More "discrete" but still spendy. I just dropped 20$ for decent tampons. Someday I should calculate what I've spent. But not today.
So, this woman developed the charity o-pads to get reliable menstrual pads to women.
Wilbur Sargunaraj (one of my favorite you-tubers) made this video with her:
First class! (as Wilbur would say). More environmentally friendly than disposables and they are made from fabric scraps by women the founder knows so providing jobs as well. They believe the 7 pad pack will last a woman 1 year. I bet careful washing will make them last longer. Very frugal.
(Also...Wilbur sells those pants and I seriously want some.)
Thursday, September 3, 2015
Tips from a Serial Renter
I've had a variety of housing situations over the last 3 decades since leaving the nest. Dorms. Apartments. Trailers. Houses. Campers. A van down by the river (actually on the road sleeping in rest stops...don't tell Mom). Shared. Alone.
Lots and lots of experience with landlords and rentals and leases and sublets.
Here are some tips for those seeking a new rental:
1) Try to find a rental through a personal or professional connection if at all possible, but avoid renting directly from family or best friends. Some of my best rentals have been through a friend of a friend. Enough connection to make you both trust each other a bit and to not want to be jerks to avoid embarrassing the mutual friend. For example in grad school I once rented from an English professor who was the colleague of my professor's husband. Enough for the linking people to provide good references (though they may have regretted that after my dog at part of the door...sorry!), but not so much that either of us felt we were doing the other a favor.
2) Barring that, READ REVIEWS online about landlords and rental companies. My sister once called me up because her friend's daughter was moving to my area for grad school and trying to rent an apartment before arriving. She had gone through the WORST rental company in that town and was looking at apartments in frat row of a college town known for beer bashes that turn into 3 day riots. To me, this was NOT a place for a grad student serious about studying. I went to the agency to look at a few of the apartments on her behalf. 1 stank of urine. 1 just stank. All had mold. And the agency had draconian policies about renewing leases by January for the following August. Nevermind the pages long list of complaints with the Better Business Bureau and various other agencies and the easily located (thanks interwebs!) mass of lawsuits from former tenants. NO NO NO. I drove around and found apartments advertised only by yard signs in the better areas (not perfect..see "grad student' and add "budget"). I called one number and it turned out to be a professor retired from the department she would be attending. This is a good link as noted in #1. I viewed the apartments. And screened the landlord a bit. He was a decent human and we knew people in common (again, see #1). I sent photos, maps and reviews and she rented one of those. It seemed to work out well. Had she had the time to read the online reviews she would have known the rental company was a loser, and she didn't at that time have the gumption to call up the department secretary and ask about professors who have rentals (many aging professors having rentals...word). Being 1500 miles away put her at a huge disadvantage. Her mother, my sister and I were perhaps a wee bit pushy and controlling but it was for her own good.
3) Read the lease. All of it. Ask questions. Ask a lawyer or a friend with more rental experience if you don't understand something. This seems obvious to me but I hear that not everyone reads leases. There are terms that can really get you into trouble. Late fees, eviction fees, excessive notice for moving out, requirements to renew, etc etc etc. If you want to change something, both you AND the landlord/management company need to sign and date right next to the change to avoid either of you saying "I didn't know."
4) Keep a copy of the lease. Keep several. Scan it and email it yourself. This got me out of a sticky situation this very year. The property manager was frankly crap. Didn't answer calls. Took 6 weeks to return the signed lease and then it was just a cell phone photo of his signature, never a copy of the entire lease. Eventually rumor has it he delayed responding to an emergency repair call until a ceiling fell in. At last the management company and he parted ways. A new manager arrives on the scene and just assumes everyone has the same lease. Taking advantage of the crap nature of the previous manager, I had put many new clauses in the lease, like making it go month-to-month, lowering the deposit, and various other things. The dude never noticed but I was the only one who kept a copy of the least with the terms written in and a copy of the signature page with both his and my signatures, meaning that cell phone photo. So, the new manager just went with it. If your records are better than theirs, you win.
5) Take photos of the place as you move in recording every single detail. Again, email these to yourself and possibly the landlord. This records the condition at move in. There can be no debate. If your camera/phone/whatever had the option to put a date and time stamp on the photo, use it. Take pictures of every wall, floor, ceiling, window, fixture, appliance, closet and cupboard (doors and interiors). With digital photos this costs you pretty much nothing. As you move out, take the same set of photos with time stamps and email them to the same people as the first set. Of course if you're going to trash the place and just let the deposit go, don't bother with the photos unless you want to brag to your friends about your trashing skillz.
6) Re-read the lease every now and then. Boring, but you might find the landlord is not meeting the terms and that's always fun. Once every 6 months or year is fine.
7) View place before you rent if at all possible. If not you then a friend, acquaintance, or family member. If you've got no one to view it, go with the shortest term lease you can possibly get/afford. When you view it, do more than that. Smell it. Open all the cupboards and closets. Touch the carpet (if you can find a rental without carpet that is better...carpet is never quite clean and old stank will come back once that gallon of febreze the previous tenants used to cover the smell of beer vomit and cat pee wears off). If it is sticky just say no and move on, or if you can't, then make a note on the lease and get the landlord to initial it along with you. Check the water pressure and ask to see the hot water heater. Have the landlord show you the electrical panel. Is it old knob and tube wiring with screw in fuses? It might be OK but you may not be able to get much in the way of renters insurance if you admit it to the insurance company. If you don't have nice things, don't worry about it but get more smoke alarms. Open and close all doors. Flush the toilet. Turn on all faucets, hot and cold. Does the hot water show up quickly? Ever? Try all the electrical switches and if you're up to it, check the outlets. I always forget that last one and this last apartment ended up with a place with ZERO grounded outlets and many outlets that smoked or heated up. It was a month-to-month lease and cheap so I gutted it out...and added smoke alarms and fire extinguishers.
8) Make a note of everything. On paper, in email, where ever you like. Just write it down with a date. The date the first fuse/breaker blew. Because it may continue to be a pattern. The date the roof first leaked. The date the landlord showed up drunk and just stood there. Just make a note. If things go badly, you've got the record.
9) Be polite. No matter how gross the place or how drunk the landlord, you be polite.
10) Don't take any crap. Being polite does not mean being a doormat. Don't swear at anyone or threaten or slam doors in faces (unless someone is threatening, then all bets are off and call the cops immediately). Don't let the landlord come in without notice if notice is required in the lease. Do not allow the landlord to change the terms.
11) Print out or download a copy of the state, county and city rental laws. There is often a tenant-landlord office at colleges and universities where they have hard copies of these and their websites have links to the online versions. If you live in a college town, take advantage of that. If not, it's not hard to find. Libraries and city halls and county court houses are there to help you. I can't think of a state that doesn't have it's code online. The library can help you.
There are plenty more things, but these are the things I've screwed up or seen people screw up.
Thursday, August 27, 2015
My New Favorite Decision Square
Because I'm an anthropologist, I have no management training or skills. This has turned out to be a challenge sometimes.
I was randomly watching some TEDx talks (the TED talk style drives me bonkers but it was better than the other trash I could have been watching on the youtubes) and one had this thing on how to make choices or set priorities in work and life situations. Presented by some MBA dude I think. It seems like a handy way for me to do some simplification.
Here's the thingy:
 Just fill in the squares. Like I hate trying to find shoes that fit right so that goes under "things I hate" and "have to do" (because I really do need to wear shoes). Turns out I have pretty much automated that already. I like Keens brand Pyrenees style boots. I actually have a reserve pair in storage because a) the style is discontinued and b) I found them online for 50$. I had my shoes shoes (like not boots) automated as well. Keens Briggs style. But, they changed the model a bit and I don't like them now so I'm on a quest. The current pairs are trash. I got a pair of a different style, same brand (Thanks Chris-n-Pat for B-day money!) so I have a good pair of shoes. But alas, I will need to find another stable style.
I have done the same thing with bras and undies. One style, one size, one brand. Just buy it. It also means I just keep an eye out for sales or cheap sources. When I'm near a discount clothing store I run through and see if that is there. I buy a few bras and several pairs of undies ahead of the curve so I haven't run out in years.
Automating the stuff you don't love but have to do, frees up mental energy for the stuff you love.
Then there is the "Eliminate"...the first run through the square ended up with a not much in there. That was good to see. I've already eliminated quite a bit of those things I hate and don't have to do. Haircuts...don't like them, don't do them. Last haircut, even trim in fact, was in 1989. Nothing bad has happened. Make-up...never even started. Earrings...never even started. Shaving. Quit years ago (which is why I went to the Dr. to get a mole removed...I used to just hit them with the razor while shaving, now I don't have a razor, and I already paid the Dr for a year of care so let him do it. I will probably take the stitches out myself though. Why drive a half hour for that?).
One big thing in the "Eliminate" box is "listening to other people's opinions on my life choices." I really really really really hate that. It's hard to eliminate though unless I completely give up talking to people or answering their stupid questions. I guess I can try that "be a mirror not a sponge" thing when they start talking and just stare blankly and think of other things.
Eliminating that stuff frees up even more time, money and mental energy for the top two boxes...things I love whether I have to do them or not. Interesting. Very interesting.
I was randomly watching some TEDx talks (the TED talk style drives me bonkers but it was better than the other trash I could have been watching on the youtubes) and one had this thing on how to make choices or set priorities in work and life situations. Presented by some MBA dude I think. It seems like a handy way for me to do some simplification.
Here's the thingy:

I have done the same thing with bras and undies. One style, one size, one brand. Just buy it. It also means I just keep an eye out for sales or cheap sources. When I'm near a discount clothing store I run through and see if that is there. I buy a few bras and several pairs of undies ahead of the curve so I haven't run out in years.
Automating the stuff you don't love but have to do, frees up mental energy for the stuff you love.
Then there is the "Eliminate"...the first run through the square ended up with a not much in there. That was good to see. I've already eliminated quite a bit of those things I hate and don't have to do. Haircuts...don't like them, don't do them. Last haircut, even trim in fact, was in 1989. Nothing bad has happened. Make-up...never even started. Earrings...never even started. Shaving. Quit years ago (which is why I went to the Dr. to get a mole removed...I used to just hit them with the razor while shaving, now I don't have a razor, and I already paid the Dr for a year of care so let him do it. I will probably take the stitches out myself though. Why drive a half hour for that?).
One big thing in the "Eliminate" box is "listening to other people's opinions on my life choices." I really really really really hate that. It's hard to eliminate though unless I completely give up talking to people or answering their stupid questions. I guess I can try that "be a mirror not a sponge" thing when they start talking and just stare blankly and think of other things.
Eliminating that stuff frees up even more time, money and mental energy for the top two boxes...things I love whether I have to do them or not. Interesting. Very interesting.
Tuesday, July 28, 2015
Extremely Useful Things for the Makeshift Water System
So I've been thinking a bit about water. OK. I've been thinking a great deal about water. Like I need a well and it's expensive and you don't know the price until it's done and in.
I'm still hauling water a gallon at a time from work and from friend's houses and from wherever I find myself. I keep the empty gallon jugs in the car and fill up as I go. A friend just asked if she could have a couple of gallon jugs for a raft trip and I blanched...uh...they are all in a constant rotation and in use.
There you have the first useful thing: Gallon jugs. Bigger containers are fine too, but not as useful. One can discretely fill a gallon. Filling a 5 gallon is less discrete and requires a spigot and/or a hose or filling a gallon which you then dump into the bigger jug. FYI: garden hoses are chock full of toxins that they leach into the water. I don't want to use them for drinking water.
Here's my current system for the gallons: Fill 2 or 3 per day during the work week. 2-3 at a time are in the freezer part of the work fridge. These are swapped out every 2 days and taken in a transport cooler to my homestead where transfer them into the 2-3 coolers I have with chill foods in them. The thawing gallons from the chill food coolers go into the empty transport cooler. One often just becomes the current drinking supply. The chilly thawing ice water is used for the final hair rinse or refreshing drink. I also use that transport cooler and the thawing gallons to chill left overs or new foods headed to the chill coolers. That saves my frozen gallons in the chill cooler for an extra several hours. I can usually make it 2 days, unless it's in the 90s, on one ice transport. The weekends are a challenge when it's hot. Sometimes I will run errands in the town where I work, which is not the preferred errand town, so that I can pick up fresh frozen gallons. Not ideal, but cheaper than a well and an electrical system.
That system brings up another extremely useful thing for this makeshift water system: a good cooler. Right now I have 5. Only one was bought new and that was about 2 decades ago. One is a vintage metal cooler. It's rugged but doesn't hold cold very well so it is a transport cooler and has another task that will appear later or in another blog. One was a cast off from a friend that I meant to use just for one trip, but it fit so well on the floor of the car and is a great size in general...a frozen gallon fits well and leaves room for a dozen eggs right on top of the gallon (this is the non-handle tall square gallon water style, not the milk jug style). The other two are recent thrift buys because the system is better with a spare or two.
At the end of a day, if there is a partial gallon and I'm not short on drinking water, I empty the partial into a sun tea style glass jar with a spigot at the bottom. I have a one gallon one inside the camper at the sink for hand washing and whatever. A 2 gallon model is on the old library desk that serves as an outdoor kitchen area. It is over a 5 gallon bucket so the drain water can be reused.
Which leads to the 5 gallon buckets...so many uses. In the water system they are my drains and my irrigators. Often one serving both purposes. If there is nothing greasy or soapy in the drain bucket water (and I try to keep both out of there), it can go on the garden or compost pile. If it's greasy or soapy it goes either down a gopher hole as gopher harassment, or into the bucket-trap for mice.
I also use buckets, these a bit smaller than 5 gallon, to haul water from the creek to the holding tank buy the garden bed. We'll get to the tank in a moment. The haul buckets are smaller because 1) I had them on hand and 2) easier to carry 3 gallons on each hand than 5 gallons on each hand. They are 3 gallon buckets from the recycling center's free-bucket bin. If people have used buckets or rubber tubs or whatever, they put them in the bin and anyone can take them and use them. I have another bucket at the creek. I walk down to the creek, not far, yards rather than miles, use the creek bucket to fill the haul buckets. Then up the bank and pour into the holding tank.
So...the holding tank. This is a LARGE plastic tub I got at....the recycling center free bucket bin. Lots of things go in there. It holds about 10 haul buckets worth of water. It would technically hold more but the wall strength isn't there. It's starting to break so I keep the level down. I do haul two final buckets from the creek and just leave the water in the buckets. For a hot week, I haul twice a week or so. On a not-hot week, once a week will be enough for the raised bed and all the containers to stay watered. The holding tank isn't totally necessary, but really helpful. For one, it allows the sediment to settle out. For another, the water warms through the day and I tend to water in the evening when the shade hits the garden. This way the water soaks in and the plants have time to take it in before it evaporates in the morning. The warmer water won't shock the roots.
There is another portion of the water system...warm water. A few elements contribute to this.
Solar shower. I have one. It's 2 years old and I left it lying outside all winter. Still good. 15$. Worth it. It says it will hold 5 gallons but then I'd have to lift 5 gallons over my head and tie it up. That's a great deal of weight and water. I usually have 1-2 gallons in it. On a sunny day it heats up nicely. On a not so sunny day I can add a tea kettle of boiling water and it's good enough.
Tea kettle...for heating water for everything including showers, tea, coffee, and dish washing...on cloudy days.
Clear 3 gallon jugs are another key element in the warm water system. These look like the jugs one sees in office water coolers, but smaller. I have 2 3 gallons and also have 4 of the large 5 gallon versions. All but one of these is from the free bucket bin. The other is from next to a dumpster at a state park. I cleaned them with borax followed by vinegar. The new, shiny, clean ones are drinking water storage. The questionable ones are the warm water system. Just fill and leave in the sun. It gets plenty warm enough to do dishes, wash hair, fill the gap when I forgot to ready the solar show in time to heat it up. The 3 gallon size is manageable. the 5 gallon size is heavy and awkward which is why they ended up as long term storage rather than active use.
That's about it for the water system. It works well and other than buying gallons of water initially, often at the dollar store, to get the gallon jugs, it's free.
Wednesday, July 22, 2015
Bit More Solar Cookery and a Laundry Drying Triumph
So, in no particular order let's start with the bread and breadlike products:
This bread was quite heavy since I made with 100% sprouted whole wheat flour, a bit of yeast, salt and water. That's it. It rose really fast due to extreme heat. I punched it down and threw it in. Then it didn't rise so much but it's QUITE good. And it is keeping well. I've left it in the pan (metal plus lid equals mouse proof...also, I took it in to work with a jar of almond butter I got on super sale to use for lunches this week)

This is service berry bread! Service berries are similar to huckleberries or blueberries but grow on tall bushes and are easy to harvest. IF you beat the birds to them. It took me 3 or 4 days to accumulate a cup and a half. Birds love them and I'm not going to put netting over random shrubs and make life harder for the birds this year. Anyway, first I soaked the berries in my homebrewed honey vinegar to make a sort of shrub liquid to add to water, ginger ale, whatever. It's delicious. The berries are of course still good and a bit tangy. I drained off the shrub and used the berries in this.

The berries are a bit vinegary and tart, in a good way. So I cut out one egg and added extra baking soda. The soda mixes with the vinegar as leavening. The vinegar made for a less sweet bread. I'm liking it a lot. In fact, it was gone in 3 days. It was also made with all sprouted whole wheat flour but was not too heavy. Quite moist. Here's a view of it cut.

It was baked in a stainless steel fridge container with a slide on lid (hello mouse proof!) which made it easy to transport and works super well in the solar cooker. I left the lid on for about an hour then took it off for a bit to let the top get a bit more crusty like I like it.
This and the bread above were cooked the same day. The oven ran about 325 steadily without too much turning or aiming. I was a totally sunny clear day with almost no smoke or dust haze. I'm not sure why the oven wasn't hotter. I may need to do a better job getting dust off the mirrors and glass cone.
Here's an earlier whole wheat bread that was WAY too heavy. I still ate it though.

The cooker was running even hotter that day and things got a tad burned.
Below is yet another bread. This one part high gluten flour to help along the sprouted wheat flour. It turned out fabulous. The downside was i ate it all way way too fast.

In the skillet is a squash and amaranth frittata (my word for stuff in eggs, baked or fried). It was actually SO hot and sunny that day that when I opened the cooker and took the lid off the skillet to check the frittata, it was sizzling! The cooker easily hit 375F that day. Putting the cast iron skillet with lid in there, I suspect the frittatta was a bit hotter than that.
All this cooking was in the "Death Ray" or "Solar Chef".
I do still use the cardboard box corner with foil cooker to make my weekend coffee. It isn't ready at 8am, but a lovely cup of coffee at 9:30 or 10 is a good reason for a break from hauling garden water or fretting about plans or whatever. I was talking to Gramma last weekend as I drank that coffee and since I don't bother with careful filtering as I pour it into a cup, I noted that I had hit the grounds. She said her dad's answer to that was another spoon of sugar and then chew. I hadn't added any sugar but I may try it with the grounds.
And finally...my laundry triumph:

2 loads of laundry on the awesome 6$ thrift store purchased rack! (the same one that was inside before) Yeay! That saved me about 4$. And wear and tear on the clothes. And I must say I much prefer the smell of sun and breeze on my clothes to leftover-bounce from public laundromat dryers. These euro style drying racks are more compact than the american ones. So far it's holding up well. The cardboard under it is in case something fell off. And to keep the grass/hay seeds off my clothes. I spend too much time picking pine needles and seeds out of surprising places.
This bread was quite heavy since I made with 100% sprouted whole wheat flour, a bit of yeast, salt and water. That's it. It rose really fast due to extreme heat. I punched it down and threw it in. Then it didn't rise so much but it's QUITE good. And it is keeping well. I've left it in the pan (metal plus lid equals mouse proof...also, I took it in to work with a jar of almond butter I got on super sale to use for lunches this week)
This is service berry bread! Service berries are similar to huckleberries or blueberries but grow on tall bushes and are easy to harvest. IF you beat the birds to them. It took me 3 or 4 days to accumulate a cup and a half. Birds love them and I'm not going to put netting over random shrubs and make life harder for the birds this year. Anyway, first I soaked the berries in my homebrewed honey vinegar to make a sort of shrub liquid to add to water, ginger ale, whatever. It's delicious. The berries are of course still good and a bit tangy. I drained off the shrub and used the berries in this.
The berries are a bit vinegary and tart, in a good way. So I cut out one egg and added extra baking soda. The soda mixes with the vinegar as leavening. The vinegar made for a less sweet bread. I'm liking it a lot. In fact, it was gone in 3 days. It was also made with all sprouted whole wheat flour but was not too heavy. Quite moist. Here's a view of it cut.
It was baked in a stainless steel fridge container with a slide on lid (hello mouse proof!) which made it easy to transport and works super well in the solar cooker. I left the lid on for about an hour then took it off for a bit to let the top get a bit more crusty like I like it.
This and the bread above were cooked the same day. The oven ran about 325 steadily without too much turning or aiming. I was a totally sunny clear day with almost no smoke or dust haze. I'm not sure why the oven wasn't hotter. I may need to do a better job getting dust off the mirrors and glass cone.
Here's an earlier whole wheat bread that was WAY too heavy. I still ate it though.

The cooker was running even hotter that day and things got a tad burned.
Below is yet another bread. This one part high gluten flour to help along the sprouted wheat flour. It turned out fabulous. The downside was i ate it all way way too fast.

All this cooking was in the "Death Ray" or "Solar Chef".
I do still use the cardboard box corner with foil cooker to make my weekend coffee. It isn't ready at 8am, but a lovely cup of coffee at 9:30 or 10 is a good reason for a break from hauling garden water or fretting about plans or whatever. I was talking to Gramma last weekend as I drank that coffee and since I don't bother with careful filtering as I pour it into a cup, I noted that I had hit the grounds. She said her dad's answer to that was another spoon of sugar and then chew. I hadn't added any sugar but I may try it with the grounds.
And finally...my laundry triumph:
2 loads of laundry on the awesome 6$ thrift store purchased rack! (the same one that was inside before) Yeay! That saved me about 4$. And wear and tear on the clothes. And I must say I much prefer the smell of sun and breeze on my clothes to leftover-bounce from public laundromat dryers. These euro style drying racks are more compact than the american ones. So far it's holding up well. The cardboard under it is in case something fell off. And to keep the grass/hay seeds off my clothes. I spend too much time picking pine needles and seeds out of surprising places.
Tuesday, July 14, 2015
And Then It Rained For 2 Days and 2 Nights
And lo...she had to hang the laundry inside.
 But thanks to the ability to pile crap up, the fact that most stuff is stuffed into stackable rubber tubs, AND thanks to the amazing find of a Europe style clothes horse which holds a ton of clothes in a small space, she is able to do it.
I TRIED to dry them at the laundromat. The load was in the dryer for an HOUR and still slightly damp. I gave up thinking "well at least the dryer I used for the sleeping bag worked." Uh...then later I unrolled said bag and lo, it too was dampeth.
So, I put on a sweatshirt with my long jammy-pants and slept under the bag rather than in it. I figured my body heat rising through it would help dry the damp. The next day I was going to be in Moscow so I took it to a laundromat there and put it in a giant dryer on the "center of the sun" heat setting for 10 minutes. That bastard was DRY then.
The laundromat in St. Maries (pronounced "Saint Mary's" not "Saint Marie's") was more expensive than those in Moscow, but I was already in St. Maries for something else so I think overall it saved money. Normally I would not bother with a dryer. I would hang the stuff from the start. Since it was raining all weekend, I tried going ahead and using the dryer for most stuff...though not the bras or the spendy wool socks. I learned about the bra thing from Hedwig starting at 33 seconds:
Also..I totally want that tooth phone...dang. I had a fake tooth put on the implant last week and I didn't get the phone add-on.
Anyway, back to laundry. It took a good 24 hours to dry the damp jeans waistbands. The weekend before it was nearly 100 degrees with a stiff wind (want to see the scorch marks on my back from wearing a tank top? Pretty grim.) and my clothes were hung on the clothes horse outside. The first items hung up were pretty well dry by the time I hung the last items.
I spent my rainy time well. I got called out of town on a job duty on Saturday and Sunday mooched a shower at a friend's house (Thanks Sally!!!) and did the radio show. We had an ACTUAL astrophysicist on the air!
Sally said "astrophysicist" like 8 times and never once did this happen (53 second mark):
Anyway, the drying laundry in the camper was a good bit of practice on tiny simple living...it can be done! I still had the entire dinette-bed area to lounge around in which honestly is plenty of space for reading and whatnot. I also learned that I STILL have a ton of clothes with me despite downsizing to one rubber tub, 4 cookie tins (no mice in the undies please!) and a 5 inch wide closet for clothes. There is also a change of clothes in a suit case in the car in case of emergencies like I spill something, and several pairs of boots/shoes in various places from work to the car to the trailer. Of course, winter things and some things I hadn't chucked yet are in storage.
More on camper life anon.
Wednesday, July 1, 2015
Rhubarb Raspberry Cobbler in the Solar Cooker!
This was fun...and delicious.
 I admit I got cobbler mix at the dollar store...it was easier. I still had to stir in some fat and water (which was supposed to be milk but water worked fine). Then it looked too runny so I threw on some corn starch.
The filling was local rhubarb and local raspberries from the Plummer farmers market. I had already soaked the berries for shrub. Yum. So they were a bit tangy from the vinegar. I had brown sugar already opened so that was the sweetener.
The cooker heated up fast on a SUPER sunny day yesterday. And I baked it in about 40 min. While baking I did leave the lid on the pan. the pan is a small black enamel roaster. Works really well in there.
Tuesday, June 9, 2015
Seriously...STOP IDLING THOSE CARS
It's killing me. Actually, it's killing all of us. Slowly.
I stopped by a jobsite for work yesterday to find the project super in a trailer with the AC set on "pre-1900 Antarctica" and his pickup idling outside. WTF??? PICK ONE.
Also seen idling...EVERYONE.
Friends and I met in Portland, OR and made a visit to Multnomah Falls. I lost count on how many people were sitting in cars in the parking lot with the engines idling while they texted and chatted. Not only were they wasting petrol, they were also blocking parking spots much needed by the folks crawling slowly by for 2-3 miles hoping for a parking spot. They could have at least driven somewhere not crowded to idle and text.
Then last evening I walk to the laundromat to find 1 vehicles IDLING in the lot. The laundromat was not crowded. 100% of the people using it at that time who were not me, had a vehicle idling in the lot. One guy was in his car with the AC on using an electronic device. The laundromat is air conditioned. The other car had a baby in a seat and a toddler in there in the back seat. Idling, lights on. Parents INSIDE the laundromat in an area with no view of the parking lot. So, wasting gas and endangering children! Win Win!
Seriously people. It's OK to get out of your car. Even when it's hot out. Also OK to shut it off.
Tuesday, May 19, 2015
It's ALIVE!
The garden bed that is. I
stopped on the way to work this AM to check on it since it had been a few
days. There had been no frosts and it's been a bit rainy so I figured it
would be OK.
Here it is (yes...it's rotated...I can't get it to change and it's time to leave):

Not bad!
Everything is alive that I put in, except one unidentified plant from the
Moscow Garden Club plant sale last week. It looks like it could be a
cabbage. Its mate is still alive so I'll keep the blog posted if
something clearly cabbage-y pops out of it.
Monday, May 11, 2015
New Garden Bed
Well crap! I typed this in once and it failed. Let me try it again...
So....There is a gardening class in the town where I work. If a person attends 2 classes (or says they will) and is willing to talk about how their garden is doing, and is willing to share any knowledge he/she has, then the person gets the bits and supplies to make a 4x8x1foot raised bed! Very cool. And very nice.
I've already attended more than 2 classes, talked to people about my garden bed (like that it existed...) and volunteered to teach 2 classes (vermicomposting and fermenting).
Here is the basic bed:

As you can see, I put rotted wood in the bottom. This is supposed to help it hold moisture and require less watering over dry periods. It will also slowly decompose and build soil rich in organic matter. This is a twist on Sepp Holzers big permaculture beds that have whole tree trunks in them. On top of this I put composted manure (from bags since I don't have a handy animal source). I want something available to work with the carbon in the wood. As an afterthought, I threw in some old dry deer bones, mostly ribs, that had been lying around the land for a year or so. My hope is this will add calcium and minerals over the years. Who knows.
Here it is with some of the manure and another experimental addition:

The rails will do many things...they stabilize the corners and link the upper and lower 2x6 bed frames. They are also there to hold plastic, shade stuff, anti-critter-netting, or anything else I want.
And no...the camper is NOT that far off level.
Finally, here it is with some dirt, and manure and compost (all from bags) and ready to be soaked before planting. It's best to soak the wood down early and it wasn't supposed to rain for a while. That meant hauling buckets from the creek. It's not far.

I added more dirt over the next few days. continued adding water with buckets.
Then I got some "clear" (actually whitish) 4ml plastic and put it right on the soil to warm it up.
I didn't take a photo of that for some reason but it looks like plastic lying on garden bed.
Next episode: Organizing and planting the bed.
So....There is a gardening class in the town where I work. If a person attends 2 classes (or says they will) and is willing to talk about how their garden is doing, and is willing to share any knowledge he/she has, then the person gets the bits and supplies to make a 4x8x1foot raised bed! Very cool. And very nice.
I've already attended more than 2 classes, talked to people about my garden bed (like that it existed...) and volunteered to teach 2 classes (vermicomposting and fermenting).
Here is the basic bed:
As you can see, I put rotted wood in the bottom. This is supposed to help it hold moisture and require less watering over dry periods. It will also slowly decompose and build soil rich in organic matter. This is a twist on Sepp Holzers big permaculture beds that have whole tree trunks in them. On top of this I put composted manure (from bags since I don't have a handy animal source). I want something available to work with the carbon in the wood. As an afterthought, I threw in some old dry deer bones, mostly ribs, that had been lying around the land for a year or so. My hope is this will add calcium and minerals over the years. Who knows.
Here it is with some of the manure and another experimental addition:

The rails will do many things...they stabilize the corners and link the upper and lower 2x6 bed frames. They are also there to hold plastic, shade stuff, anti-critter-netting, or anything else I want.
And no...the camper is NOT that far off level.
Finally, here it is with some dirt, and manure and compost (all from bags) and ready to be soaked before planting. It's best to soak the wood down early and it wasn't supposed to rain for a while. That meant hauling buckets from the creek. It's not far.

I added more dirt over the next few days. continued adding water with buckets.
Then I got some "clear" (actually whitish) 4ml plastic and put it right on the soil to warm it up.
I didn't take a photo of that for some reason but it looks like plastic lying on garden bed.
Next episode: Organizing and planting the bed.
Tuesday, May 5, 2015
SOLAR COOKER!
It has been dubbed the Death Ray by a young friend and I think he's absolutely correct on that.
This is a picture of it from the interwebs:

And here is an attempt at photographing mine:
.jpg) It's made of mirrors and real glass so it tends to reflect EVERYTHING.
It's made of mirrors and real glass so it tends to reflect EVERYTHING.
I had it a couple 3 weeks before I was out on the land on a day when I could use it. That was last weekend. I tried solar cooked eggs and baking bread. The oven enclosure is under the nipple-like knob. You can kind of see the oven thermometer in there.
Here it is out in the sun (lounge area in the background)

The oven got up to 275degrees Fahrenheit which wasn't too bad for so early in the year, the haze and wispy clouds, and serious wind which was no doubt cooling things down a bit. I also need practice aiming it. It is on wheels so you can turn it to follow the sun as it progressed westward. The base, easier to see in the first photo, also has a curved bit with a retractable peg so the angle can go from horizontal to vertical to catch the most sun.
 When changing that angle, there is a board, painted black and hence extremely HOT, on which the cooking items rest. This has an angle adjustment as well so in theory it could be pretty darn level. In reality for my first try, I didn't get it flat. The eggs didn't mind (they were in the shell). The bread slumped to one side of the pan but whatever. I'll get that down better as I learn to aim better.
I looked up solar cooking eggs on the internet and it said to just put them in the cardboard carton and put them in the cooker...don't try to boil water and have them in that. Then leave them for a LONG TIME...like 90 min to 2 hours. So I did that. As I took them out of the cooker a bit of smoke was wafting. The carton had a scorch mark. I had only done 2 eggs and it was a partial carton I'd put them in. I cracked one to find that it had lost all integrity in the shell. Unlike the youtube video showing a nicely boiled, if hard to peel, egg, my egg had air in the top 1/3 of the shell, and a uniform mass of white and yolk that had mixed together and turned beigy-yellow in the rest of it. I couldn't eat it. I hope the wild life enjoy the eggs. I suspect that 275degs was too hot. I think the cooker I was watching on youtube only got to about 200degs. Coddled vs baked. Big difference. I think next time I will try a solar omelet or frittata so I can look at it while it cooks and see how it's doing. I didn't want to take these eggs out too early because soft boiled eggs make me barf just looking at them.
Anyway, the bread dough was deeply flawed and finicky being pure whole wheat and sprouted wheat at that. I'd never worked with sprouted wheat flour before. I had it too wet. Still, it made a nice crusty bread, though the center was doughy. I baked some in the electric oven yesterday and it came out doughy in the middle too. It wasn't the cooker's fault, it was the cook's. Still super fun to try. I'll try a basic white bread, dry-er dough too, next time. Or perhaps a can of cinnamon rolls or biscuits.
Closer to solstice we will be attempting PIE! If I can hit 400degs, I can do pie. I saw a pie plate with holes in the bottom at thrift the other day and seriously considered it as I think you'd get a crustier bottom (and who doesn't love a crusty bottom?) but I don't want grease on the wooden board that holds the pan ... so instead I'm either going to try a black/dark pie plate, or perhaps a cast iron pan if it will fit in there. The iron will heat slowly though...I think thin is the way to go. Maybe I'll start with a 99cent banquet pie (they have apple pies now at the dollar store...) rather than putting out all the effort of making and organic scratch pie only to have it fail.
What if I heated up a cast iron pan and set the pie-plate in that to get the bottom crust going fast? Hmmm...and the cast iron would hold some heat when I opened the oven to put in the pie. If only I had a frying pan with no handle A small pie would fit inside the dutch oven...but will the dutch oven fit inside the solar cooker?
So many options. I can experiment with the Death Ray until I'm dead.
And yes, I wear SERIOUS sunglasses while using this thing.
This is a picture of it from the interwebs:
And here is an attempt at photographing mine:
I had it a couple 3 weeks before I was out on the land on a day when I could use it. That was last weekend. I tried solar cooked eggs and baking bread. The oven enclosure is under the nipple-like knob. You can kind of see the oven thermometer in there.
Here it is out in the sun (lounge area in the background)

The oven got up to 275degrees Fahrenheit which wasn't too bad for so early in the year, the haze and wispy clouds, and serious wind which was no doubt cooling things down a bit. I also need practice aiming it. It is on wheels so you can turn it to follow the sun as it progressed westward. The base, easier to see in the first photo, also has a curved bit with a retractable peg so the angle can go from horizontal to vertical to catch the most sun.
When changing that angle, there is a board, painted black and hence extremely HOT, on which the cooking items rest. This has an angle adjustment as well so in theory it could be pretty darn level. In reality for my first try, I didn't get it flat. The eggs didn't mind (they were in the shell). The bread slumped to one side of the pan but whatever. I'll get that down better as I learn to aim better.I looked up solar cooking eggs on the internet and it said to just put them in the cardboard carton and put them in the cooker...don't try to boil water and have them in that. Then leave them for a LONG TIME...like 90 min to 2 hours. So I did that. As I took them out of the cooker a bit of smoke was wafting. The carton had a scorch mark. I had only done 2 eggs and it was a partial carton I'd put them in. I cracked one to find that it had lost all integrity in the shell. Unlike the youtube video showing a nicely boiled, if hard to peel, egg, my egg had air in the top 1/3 of the shell, and a uniform mass of white and yolk that had mixed together and turned beigy-yellow in the rest of it. I couldn't eat it. I hope the wild life enjoy the eggs. I suspect that 275degs was too hot. I think the cooker I was watching on youtube only got to about 200degs. Coddled vs baked. Big difference. I think next time I will try a solar omelet or frittata so I can look at it while it cooks and see how it's doing. I didn't want to take these eggs out too early because soft boiled eggs make me barf just looking at them.
Anyway, the bread dough was deeply flawed and finicky being pure whole wheat and sprouted wheat at that. I'd never worked with sprouted wheat flour before. I had it too wet. Still, it made a nice crusty bread, though the center was doughy. I baked some in the electric oven yesterday and it came out doughy in the middle too. It wasn't the cooker's fault, it was the cook's. Still super fun to try. I'll try a basic white bread, dry-er dough too, next time. Or perhaps a can of cinnamon rolls or biscuits.
Closer to solstice we will be attempting PIE! If I can hit 400degs, I can do pie. I saw a pie plate with holes in the bottom at thrift the other day and seriously considered it as I think you'd get a crustier bottom (and who doesn't love a crusty bottom?) but I don't want grease on the wooden board that holds the pan ... so instead I'm either going to try a black/dark pie plate, or perhaps a cast iron pan if it will fit in there. The iron will heat slowly though...I think thin is the way to go. Maybe I'll start with a 99cent banquet pie (they have apple pies now at the dollar store...) rather than putting out all the effort of making and organic scratch pie only to have it fail.
What if I heated up a cast iron pan and set the pie-plate in that to get the bottom crust going fast? Hmmm...and the cast iron would hold some heat when I opened the oven to put in the pie. If only I had a frying pan with no handle A small pie would fit inside the dutch oven...but will the dutch oven fit inside the solar cooker?
So many options. I can experiment with the Death Ray until I'm dead.
And yes, I wear SERIOUS sunglasses while using this thing.
Subscribe to:
Posts (Atom)